Build your Android app in the cloud with Visual Studio App Center
Follow these steps to set up your continuous integration, delivery and feedback pipeline in minutes.
Step 1
Sign up with App Center at appcenter.ms
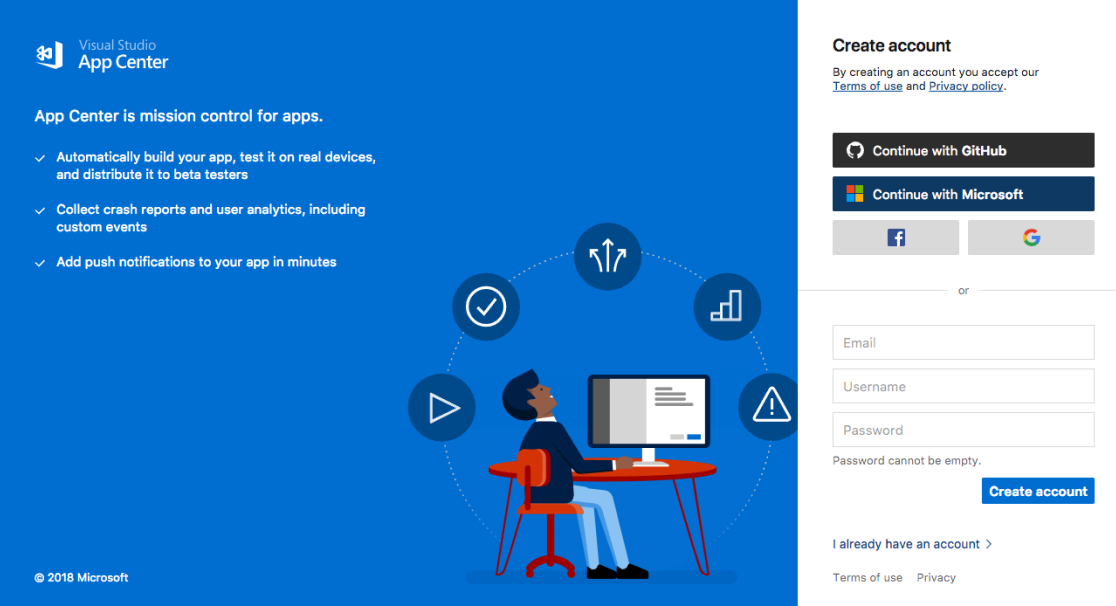
App Center Login
Step 2
Create a new app
Select “Add new” button -> Add new app. Enter your new app name. Select “Android” as your target OS and “Java” as the language you plan on writing it in.

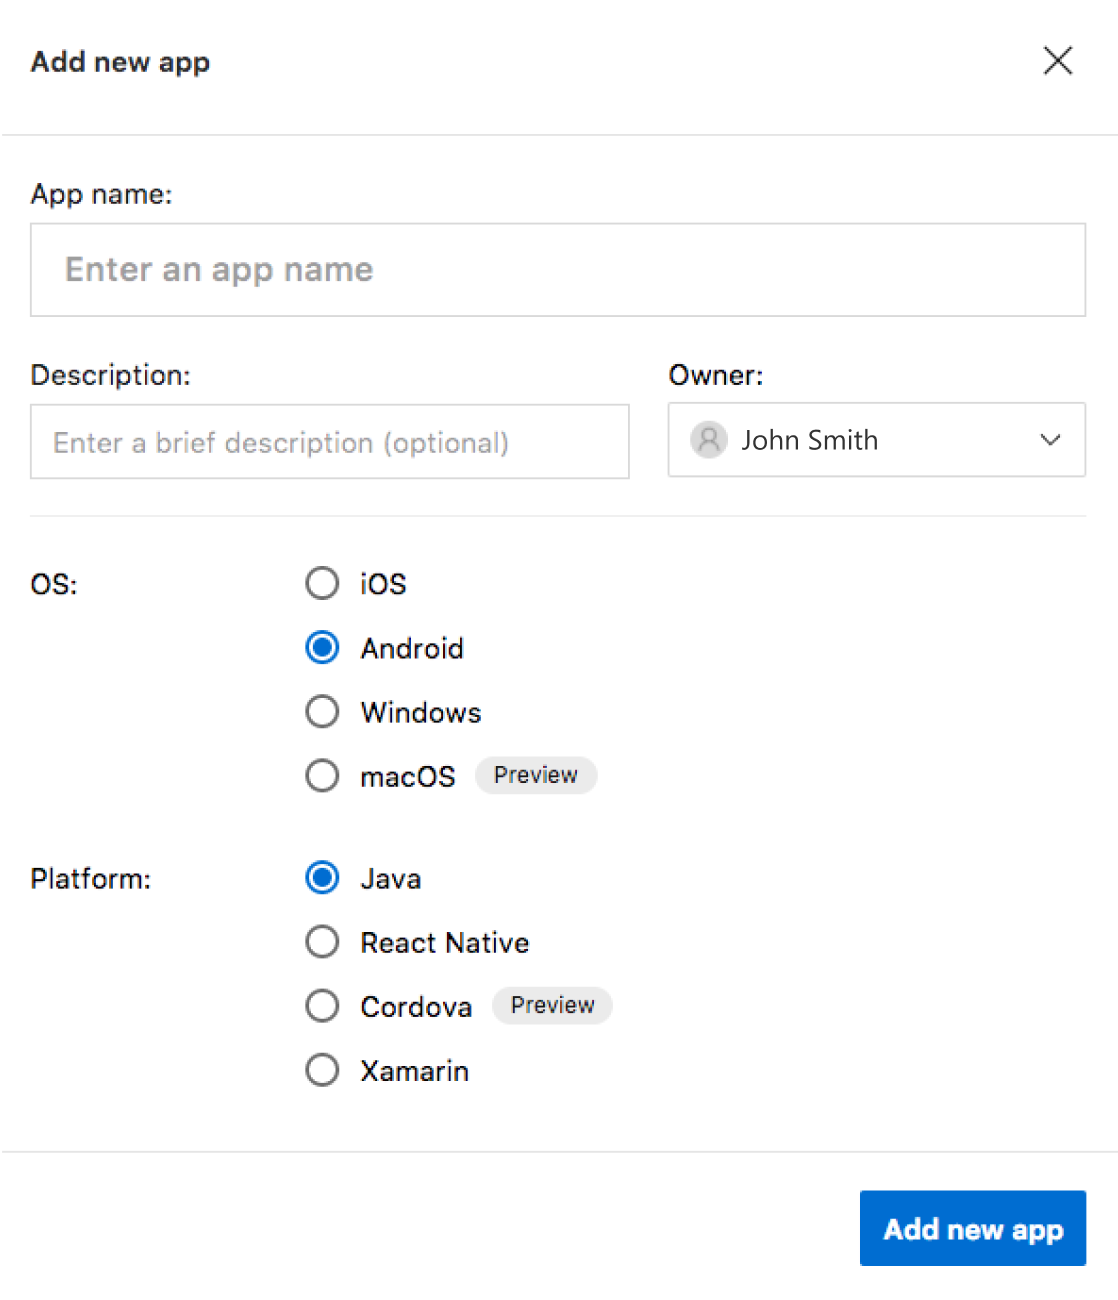
New App settings dialog box
Step 3
Configure your repository
Select the “Build” service from the sidebar, then select the repository containing the app you want App Center to build.
Once authenticated, App Center retrieves your source code. Select the app you want to build from the list.
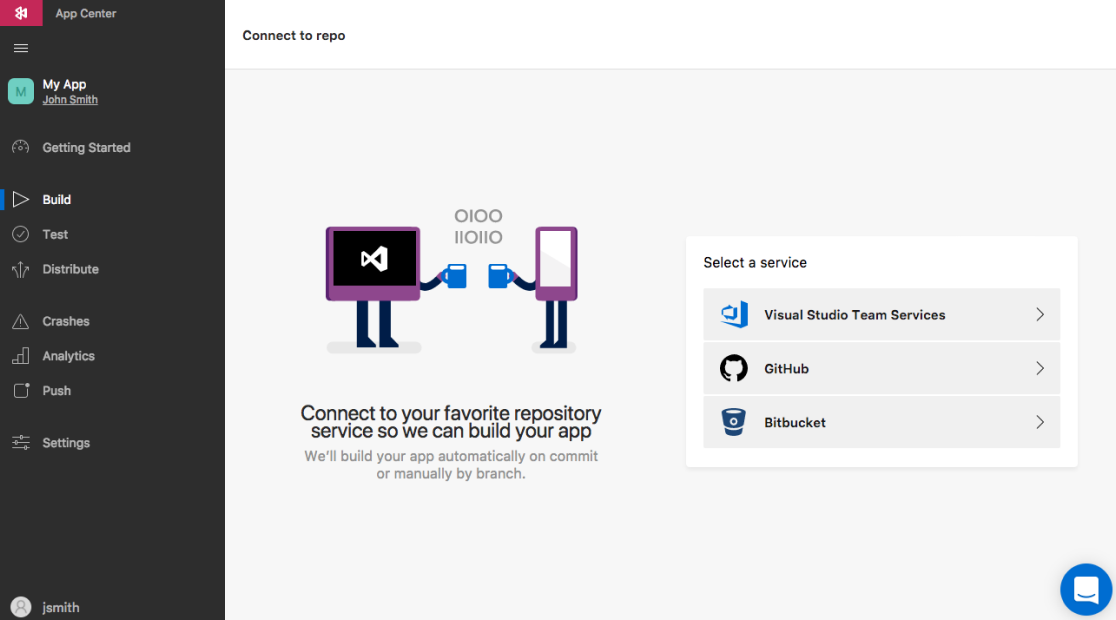
Connect a service screen
Step 4
Configure your Build & Distribute
Now your repository is linked, and all the existing development branches are listed. Select the one you want to build and select “Configure Build”.
Make sure to check the toggle for “Sign builds” and either check the box if your gradle settings handle signing or upload your keystore to sign the build to be used for distribution later.
Toggle “Distribute builds”, which will automatically send a download link to you via email once the build is complete. Finally, press “Save & Build” to kick things off.
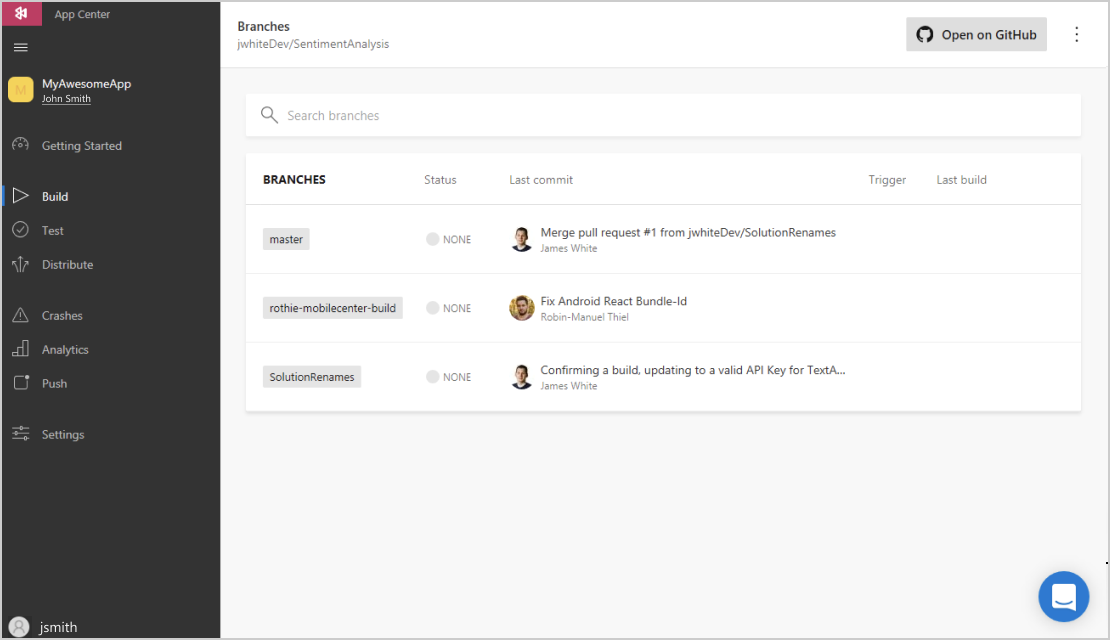
Configure a new build
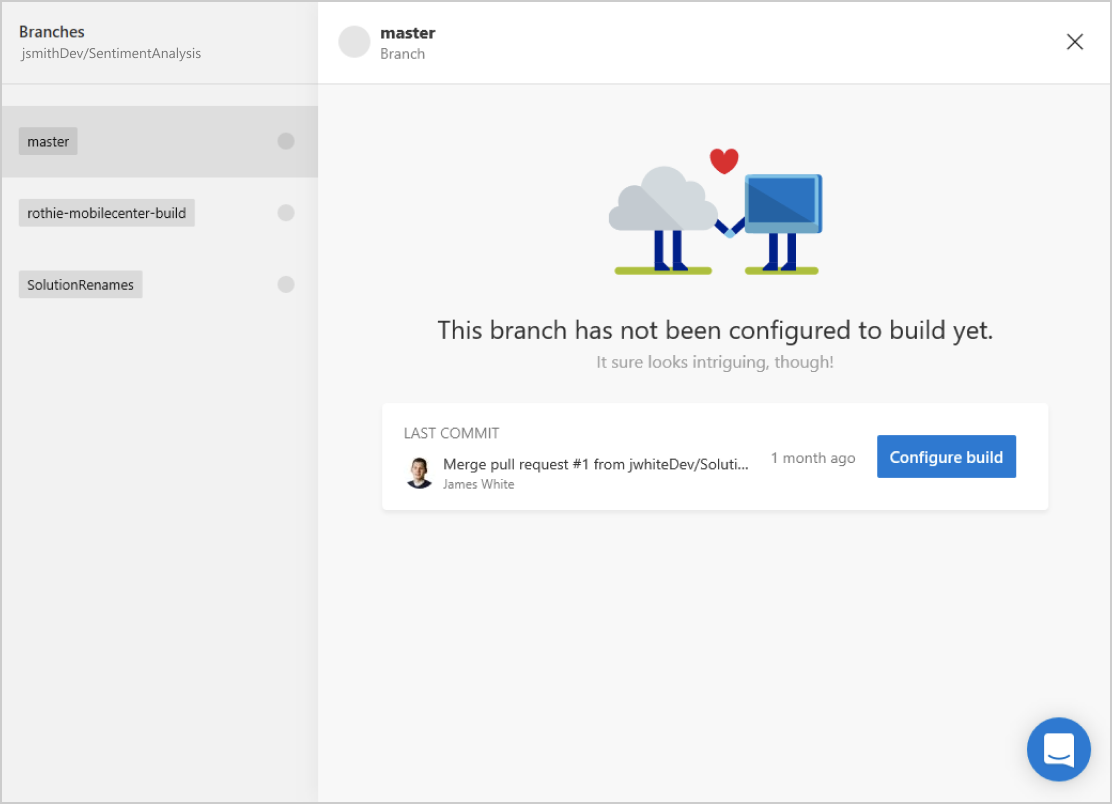
Configure build button
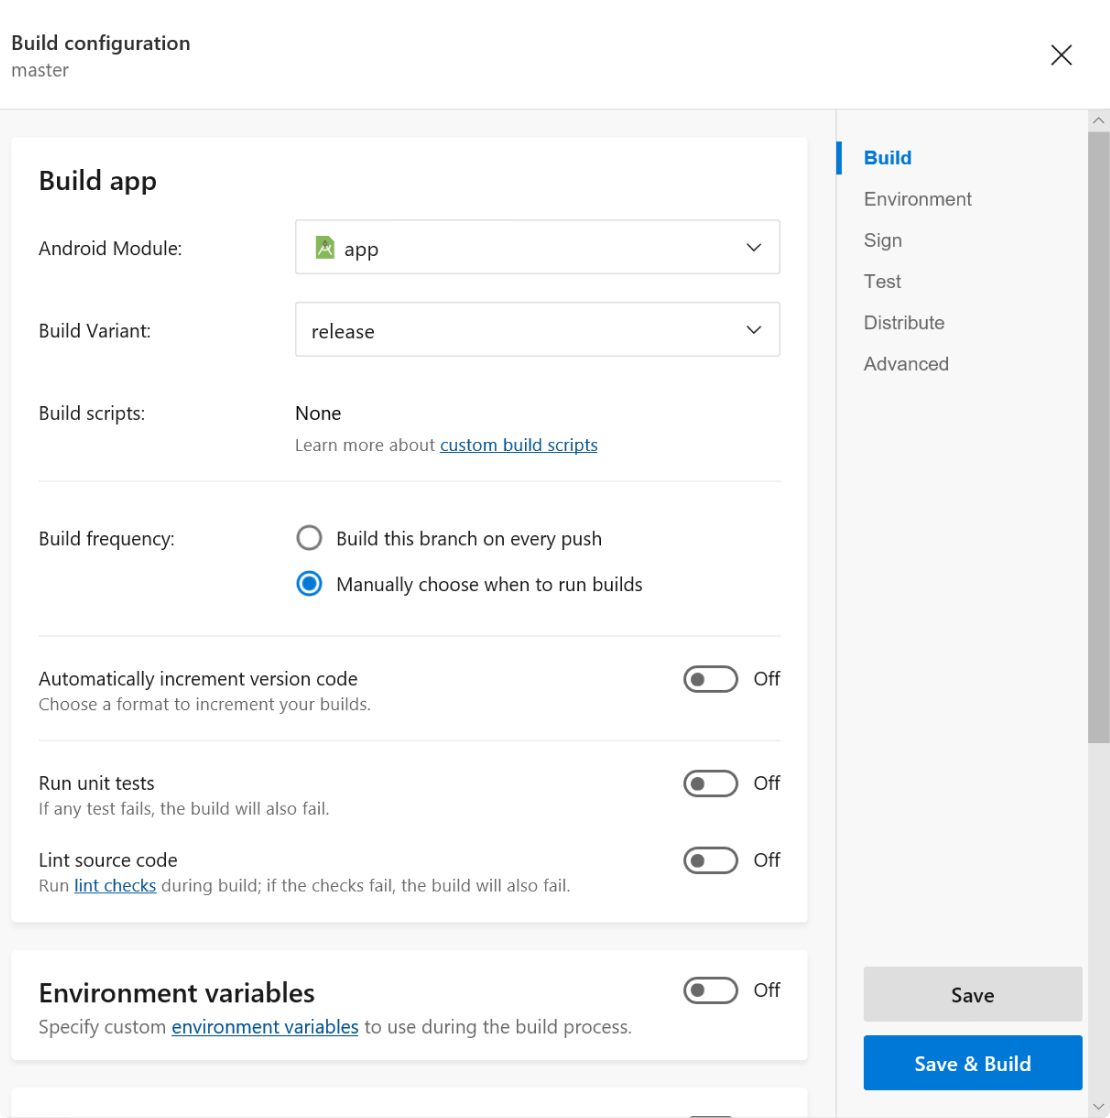
Build configuration settings
Step 5
Install your app
Once the build has run to completion, a successful build will generate an email automatically that is sent to your device with an install link. You have now configured your first mobile app development pipeline with App Center!
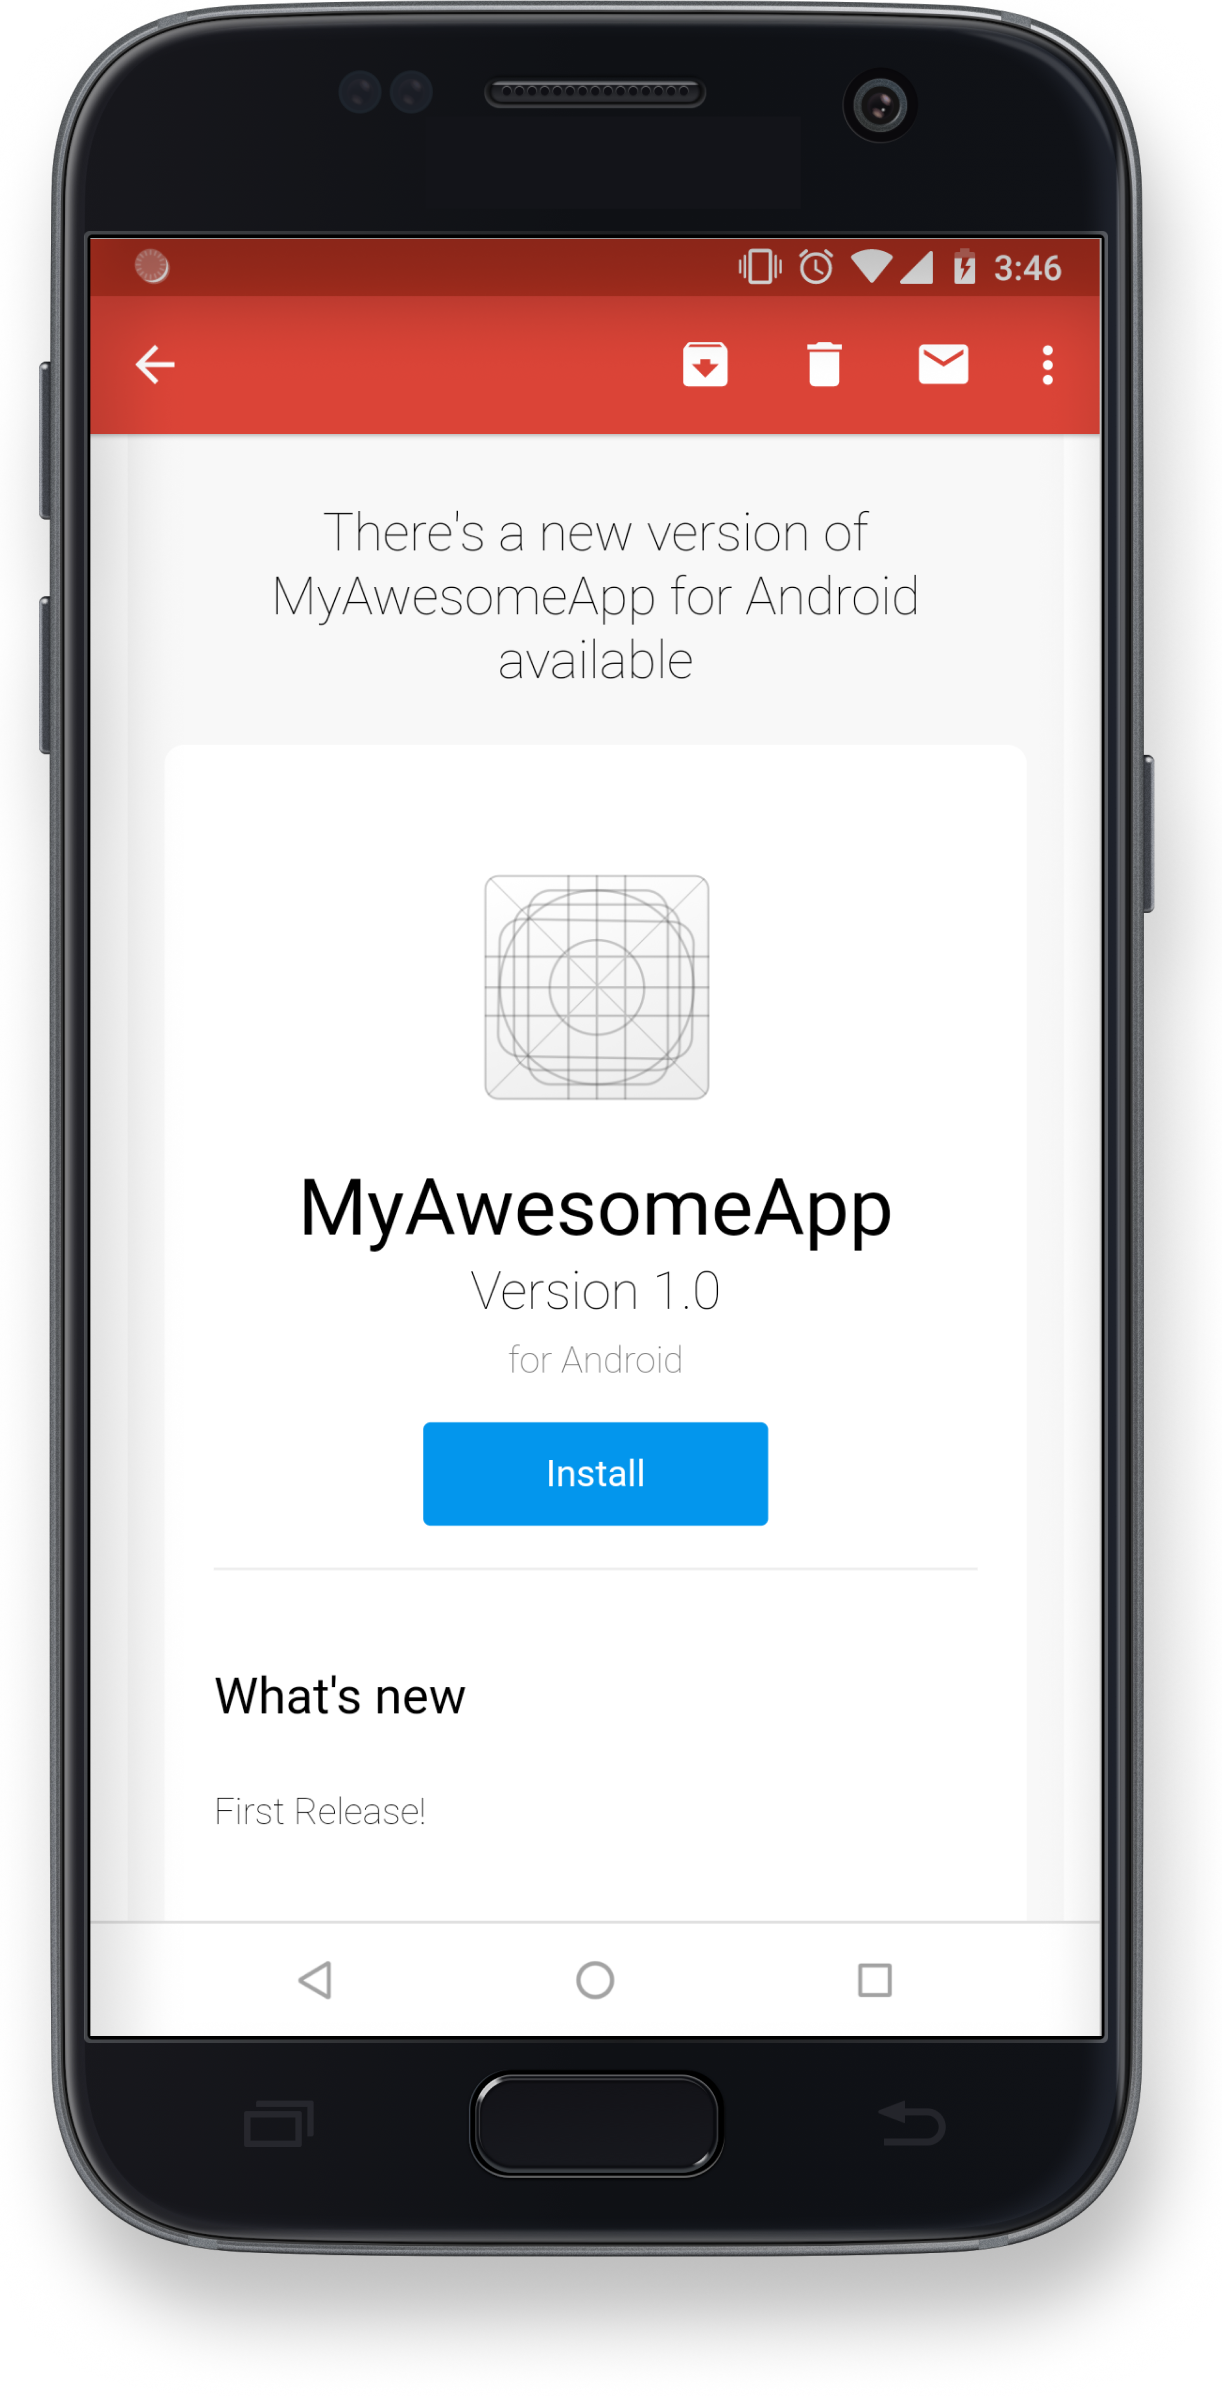

 Visual Studio Code
