Visual Studio Subscriptions Administration2024-02-09T15:38:30-08:00

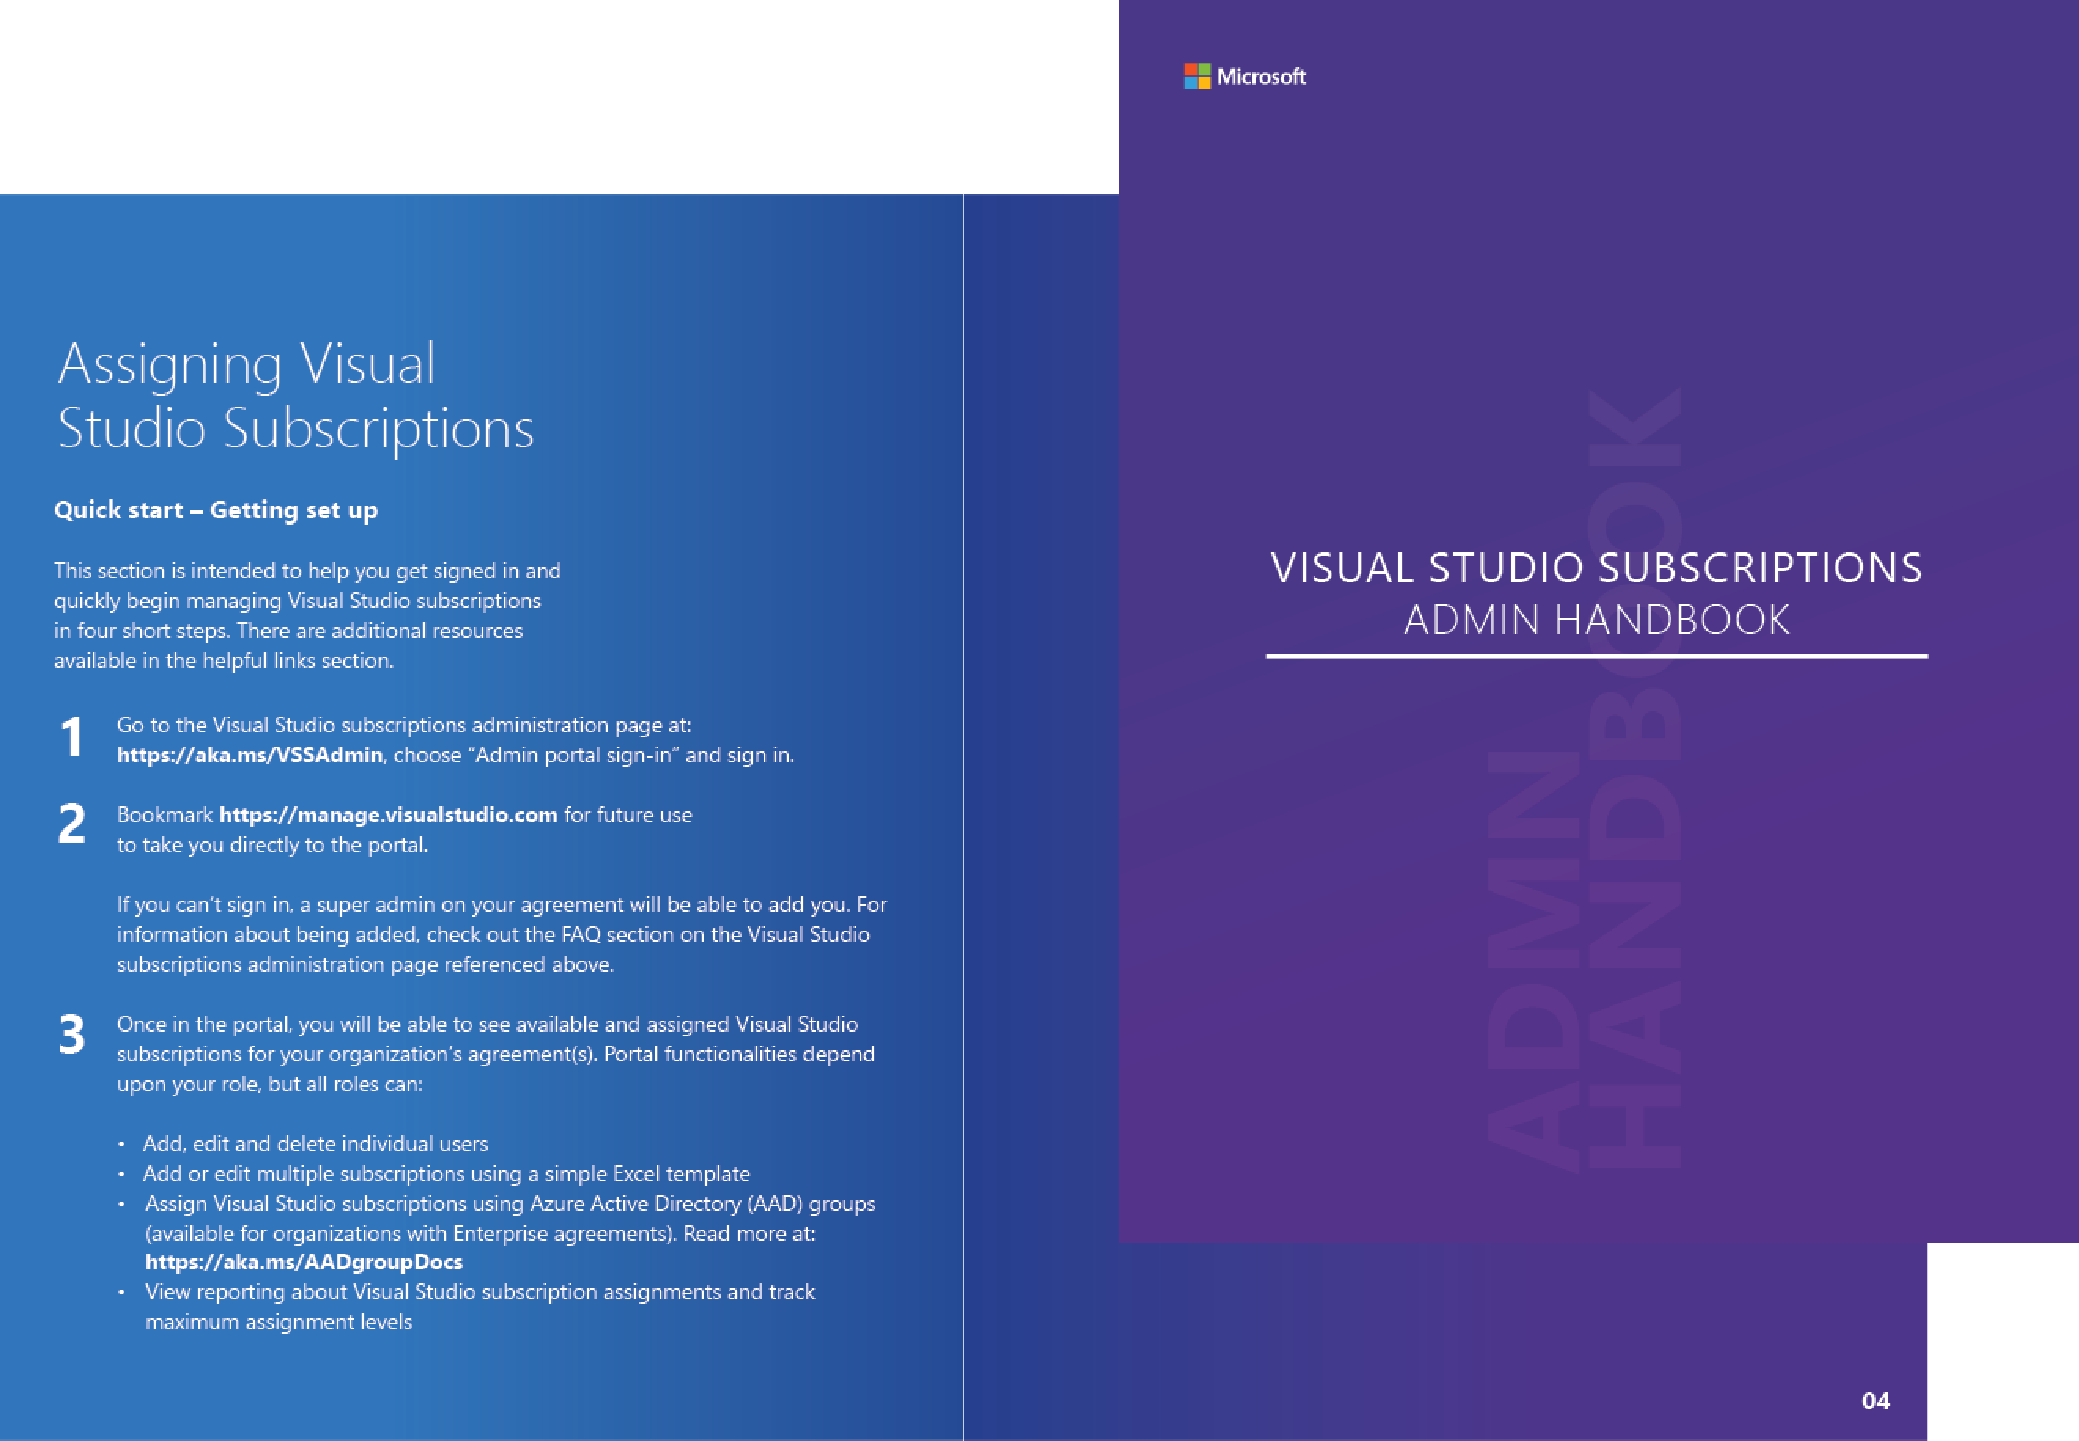
Visual Studio Subscriptions administration

Set up your developer team for success. Unlock the door for your developers by granting them access to tools, cloud services, software and training resources

Why assign subscriptions

Visual Studio Subscriptions Administrator Handbook

Quick start guide, in depth subscriptions overview, and all the links you need to be an effective Visual Studio subscriptions administrator.

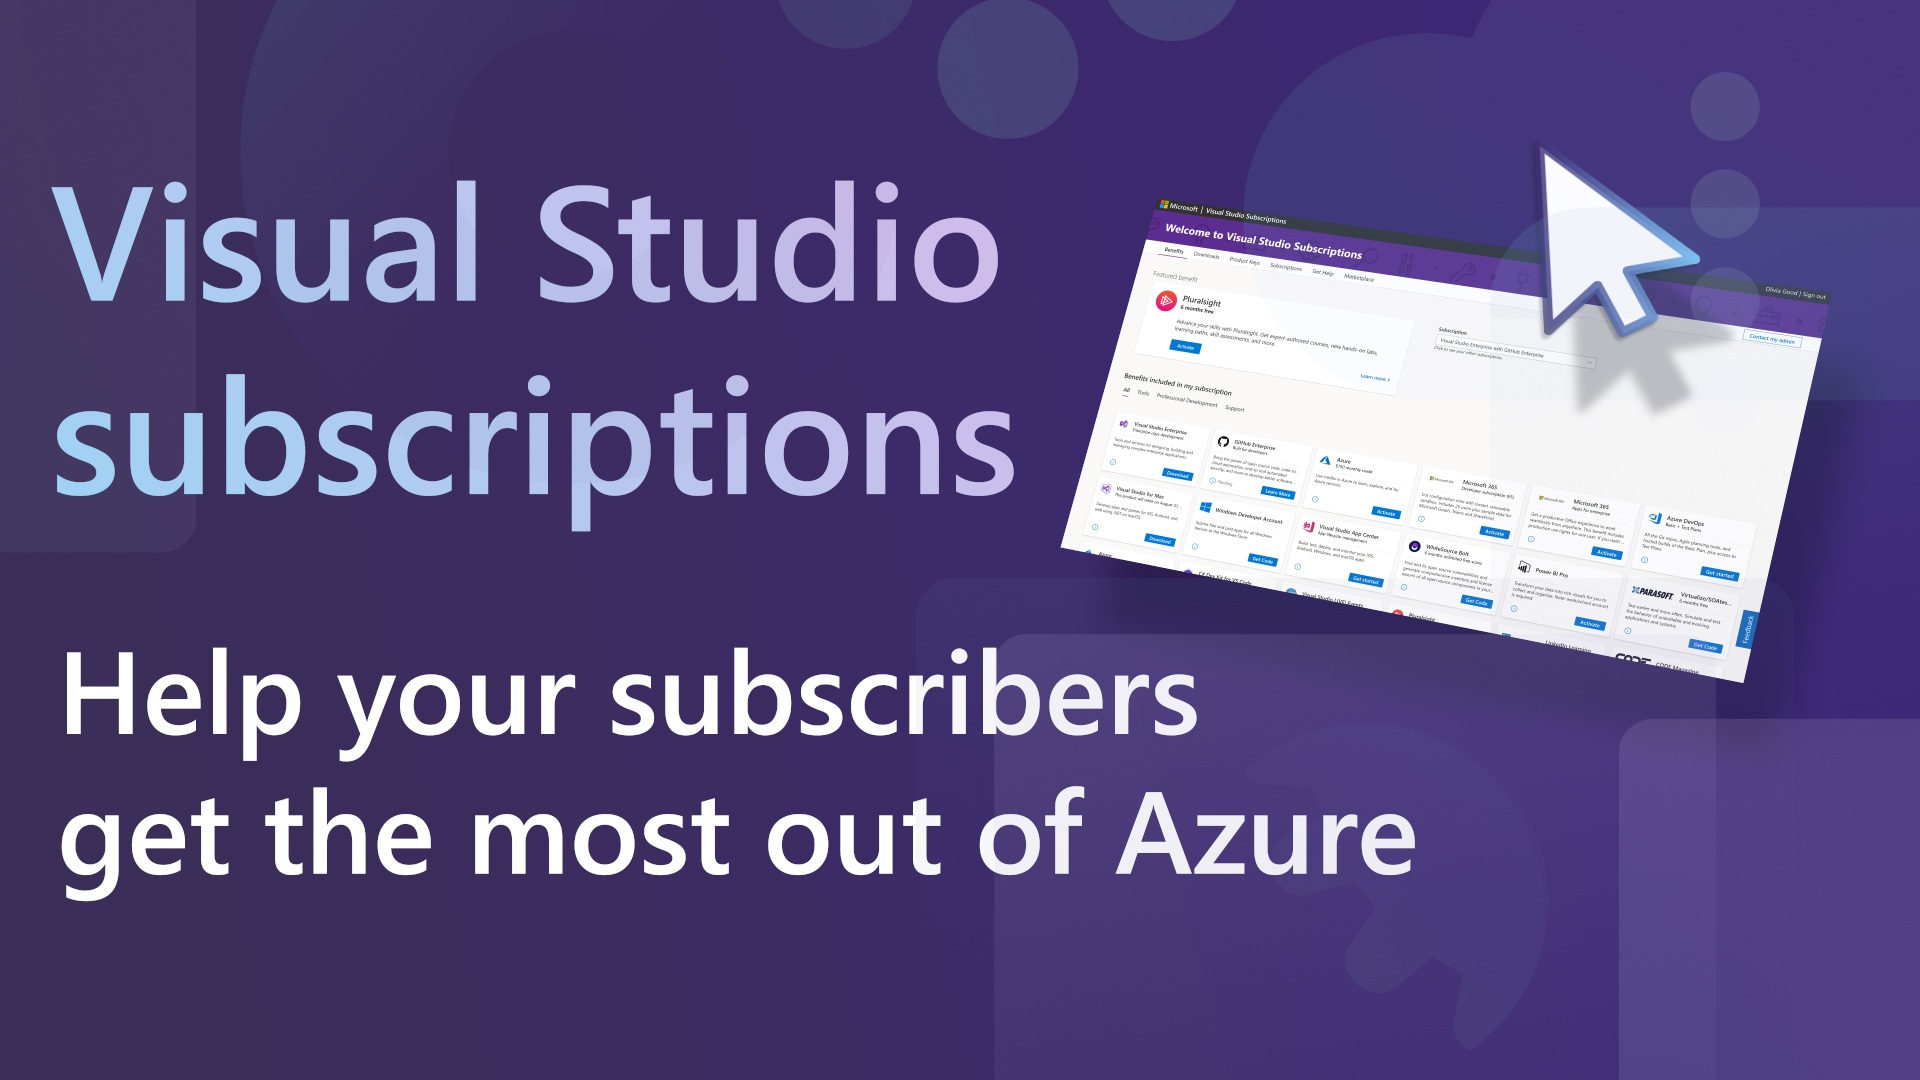
What's included in a Visual Studio subscription?

Compare benefits to choose the right subscription for your developers.
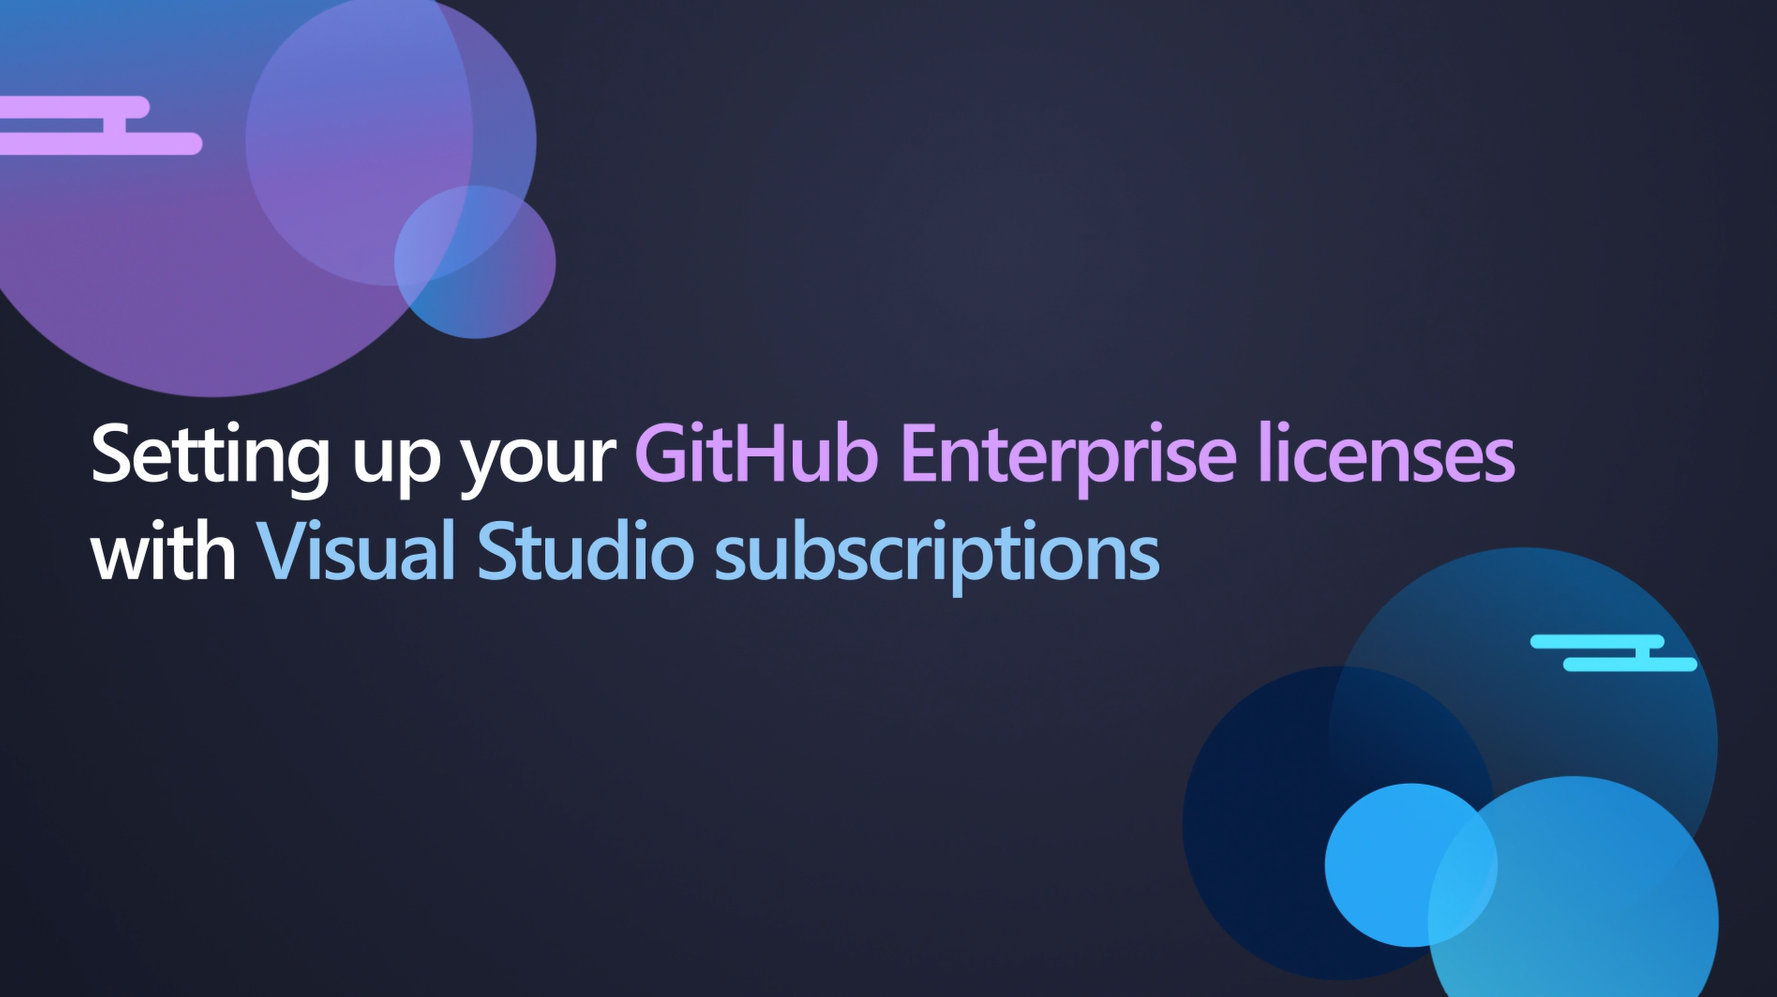
GitHub Enterprise

Empower your team. Transform your business.

Increase developer velocity, automate entire workflows, and redefine collaboration—all while enabling end-to-end security. Visual Studio Enterprise and Visual Studio Professional subscriptions both come with GitHub Enterprise for one great price, empowering you to accelerate innovation and ship with confidence from the world’s go-to developer platform.

Available in Enterprise Agreements for Visual Studio Professional and Enterprise subscriptions. Call your account manager or contact your regional Microsoft office to upgrade to Visual Studio subscriptions with GitHub Enterprise.

Frequently asked questions

Depending on the size and needs of your organization, there are several options available to you. Take a look at our page for purchasing Visual Studio subscriptions to see what works best for your organization.

0 results found.

You can access the Visual Studio Subscriptions Administration Portal by connecting to https://manage.visualstudio.com and logging in with the email address that is associated with your administrator’s account. If you are not an administrator, a Super Admin on the account can add you.

The process for managing administrators varies depending on how your organization purchases its subscriptions. Use the links below to find out more:

This page has all your updates, videos and important links. Then, written guidance on being an administrator is in our documentation.

If you are a Super Admin you can add or remove other Super Admins or Administrators. Administrators can only add or remove subscribers and will not see the Manage Administrators tab on manage.visualstudio.com.

To manage administrators:

  1. Select the Manage Administrators tab at the top of the page on manage.visualstudio.com
  2. To add select Add and type the name and email address of the person you would like to add, select the appropriate agreement from the drop down menu, select the language that they should receive their welcome email in, and select Super Admin
  3. To remove simply select the person you would like to remove and select Delete

Cloud subscriptions are managed by administrators who are assigned to the Azure subscription used to purchase the cloud subscriptions. The owner of the subscription is automatically assigned as the first administrator.

To assign more administrators:

  1. Connect to the Azure Portal at portal.azure.com.
  2. Sign in with the account you used to purchase the Visual Studio Cloud subscriptions.
  3. In the left navigation pane, scroll down to Cost Management + Billing.
  4. In the My subscriptions list, choose the Azure subscription that you used to make the purchase.
  5. Click Access control, which is located near the top of the list in the left navigation pane.
  6. Click the Add tab at the top of the page.
  7. In the fly-out pane on the right, click on the name of the subscriber you wish to make an administrator.
  8. Click on the Role drop-down at the top of the pane, scroll down, and select User Access Administrator.
  9. Click Save.

Learn more about administration of cloud subscriptions.

You can assign subscriptions to your end users one at a time, or using the Bulk Add feature to quickly and easily upload a larger number of subscribers at a time.

To assign subscriptions individually:

  1. Select the Manage Subscribers tab at the top of the page on manage.visualstudio.com
  2. Select Add and type the name and email address of the user you’d like to assign a subscription to
    1. If your organization is using Azure Active Directory the name field will search to find people in your current director. You can select from the search results, or add someone manually.
  3. If you want the subscriber to have access to software downloads when they sign into the Visual Studio Subscriptions Portal, make sure to leave the downloads toggle enabled in the Download Settings section
  4. Complete the Communication Preferences section so that we know what language to send your subscribers assignment email in
  5. If you’d like to add any notes associated with the assignment, please use the Reference selection
  6. Select Add at the bottom of the fly-out panel to complete your subscription assignment. Your subscriber will receive an email and can begin using their Visual Studio subscription immediately (there is no activation needed from your subscriber)

To Bulk assign subscriptions:

  1. Select the Manage Subscribers tab at the top of the page on manage.visualstudio.com
  2. Select Bulk Add, download the Excel template, and save a local copy
  3. All fields are required, with the exception of the Reference field
    1. To help ensure a smooth upload, observe the following best practices:
      1. Ensure that none of the form fields contain commas.
      2. Remove spaces before and after form fields.
      3. Ensure names do not contain extra spaces between two-part first or last names (for example, if a person has a two-part first name such as “Maggie May”, it should be typed as “MaggieMay)
  4. Return to manage.visualstudio.com, select Bulk Add, and upload your saved copy of the Excel template
  5. When the upload is successful you will see a confirmation page, and your subscriber list populated with your new subscribers. Your subscribers will receive an email and can begin using their Visual Studio subscription immediately (there is no activation needed from your subscribers)

Read more information about assigning subscriptions in the Visual Studio Subscriptions Administrator portal to learn more about quickly and easily assigning subscriptions

If you are an MPN customer:

Partners who earn a competency or who purchase the Action Pack in MPN are eligible to use Visual Studio subscriptions. These subscriptions are licensed per user and are only valid when assigned to a specific named user who works for the partner company. Subscriptions should be assigned using the Partner Membership Center. Learn how to manage Visual Studio subscriptions offered through the Microsoft Partner Network (MPN), or see Visual Studio subscriptions offered to partners in the Microsoft Partner Network (MPN) for details.

Cloud subscriptions are managed by administrators who are assigned to the Azure subscription used to purchase the cloud subscriptions. The owner of the subscription is automatically assigned as the first administrator.

To assign more administrators:

  1. Connect to the Azure Portal at portal.azure.com.
  2. Sign in with the account you used to purchase the Visual Studio Cloud subscriptions.
  3. In the left navigation pane, scroll down to Cost Management + Billing.
  4. In the My subscriptions list, choose the Azure subscription that you used to make the purchase.
  5. Click Access control, which is located near the top of the list in the left navigation pane.
  6. Click the Add tab at the top of the page.
  7. In the fly-out pane on the right, click on the name of the subscriber you wish to make an administrator.
  8. Click on the Role drop-down at the top of the pane, scroll down, and select User Access Administrator.
  9. Click Save.

Learn more about administration of cloud subscriptions.

Individuals who are assigned a subscription will receive periodic communications from the Visual Studio team, including an email letting them know they have been assigned a subscription. If these emails should be sent to a separate email address than that which they should sign into the Visual Studio Subscriptions Portal or VS IDE you can add a notification email address when adding a subscriber, or when editing an existing subscriber.

You can export your subscribers from your previous agreement and add them to your new agreement using the Bulk Add button. Note: your subscribers will receive an email when the new subscription is assigned to them. Learn more about exporting subscribers and using the Bulk Add feature.

If you have more than 200 subscribers on your previous agreement our support team can assist you. Select “Account, Subscription, and Billing Support” and select your country. Depending on your location, support may be available via email, chat, or phone.

Subscriptions are always assigned using the best available end date. For example, if your agreement has orders with an end date of 6/20/2020 and another one with an end date of 6/20/2021 the first subscription to be assigned from those two available will end on 6/20/2021. If you have a trusted agreement in an overallocated state, the end date will be 3 years from the date the subscription was assigned.

SLP and MPSA agreements don’t expire, however our portal currently requires an end date when provisioning the agreement. We currently use an end date of 20+ years in the future for each order under your SLP. If you have multiple orders under your SLP agreement from different days, they will have different end dates.

0 results found.

The subscription is active and can be used as soon as it has been assigned from within the Visual Studio Administrator portal. Your subscriber can sign into the Visual Studio Subscribers portal or VS IDE right away, and will receive a welcome email letting them know the subscription has been assigned.

The Visual Studio Subscription benefits page allows you to see and compare the full list of benefits and software downloads included with a Visual Studio Subscription, based on subscription level.

Depending on what product your subscriber has downloaded it can either be activated by logging in using the email address tied to the subscription, or subscribers can activate it by claiming a product key from the Visual Studio Subscriber portal.

If your organization has an Enterprise Agreement for Azure, your developers can choose between the $50-$150 Azure individual dev/test credits or 50% off dev/test pricing. They cannot use both on the same subscription. For details on how to enable the dev/test pricing option for your developers, check out the video entitled “Help your subscribers get the most out of Azure”.

0 results found.

A Microsoft Account (MSA) is a personal email account owned by an individual to access Microsoft services when an organization is not using a managed tenant for Office 365 or Azure Active Directory. A work account is one owned by the organization that issues it and is used to access services on Office 365 or Azure Active Directory tenants. For complete information about the differences between MSAs and work accounts, check out the “Learn about the differences in using MSAs (Microsoft Accounts) vs. Work Accounts (Azure Active Directory or Office 365) and how this may impact your organization“.

Adding an alternate account allows your developers to access some of their Visual Studio subscription benefits (VS IDE, Azure DevOps and Azure) with a different identity than that which the subscription is assigned to. This doesn’t provide a copy of subscription to the other account; it only provides the ability to access the two benefits with the alternate account. Read more about Visual Studio Subscription identities.

0 results found.

The process for renewing subscriptions depends on how they were purchased.

Retail: For subscriptions acquired through the Microsoft Store, connect to the Microsoft Store’s business software section, and scroll down to the Visual Studio section to see the available subscriptions. Be sure to select the renewal subscription level and activate it here: https://my.visualstudio.com/subscriptions/activate.

Cloud subscriptions: If you’re using cloud subscriptions, you don’t need to renew them. They renew automatically until you cancel them. Learn more about buying cloud subscriptions.

Volume Licensing: To renew subscriptions purchased through Volume Licensing, please contact your reseller. Find a reseller in your area.

When you cancel a Visual Studio cloud subscription, you are canceling automatic renewal. The subscription continues until its normal renewal date and then simply expires. At expiration, the Visual Studio subscriber can no longer use Visual Studio or any other benefits from the subscription.

With monthly cloud subscriptions, cancellations take effect the first day of the next month. If you only cancel some of your monthly cloud subscriptions, be sure to remove users on the first of the next month to ensure that the correct people continue to have active subscriptions assigned.

For annual cloud subscriptions, cancellations take effect the first day of the month following 12 months from the original purchase, or 12 months from the last annual renewal charge. For instance, if you bought a Visual Studio Professional annual cloud subscription on January 3, 2018 then it remains active until February 1, 2019 when it automatically renews for another year. If you cancel at any time between then and February 1, 2020 then the subscription will expire on February 1, 2020. There is no rebate for canceling part way through the subscription year with annual cloud subscriptions.

See our How charges are processed topic for additional information about cloud subscriptions.

In the administrator portal, simply reduce your subscription quantities to cancel further automatic renewals.

See our Cancel renewals of cloud subscriptions you’ve purchased topic for more information.

0 results found.

Need help?

Are you or your subscribers having trouble?

News and links for administrators

Feedback